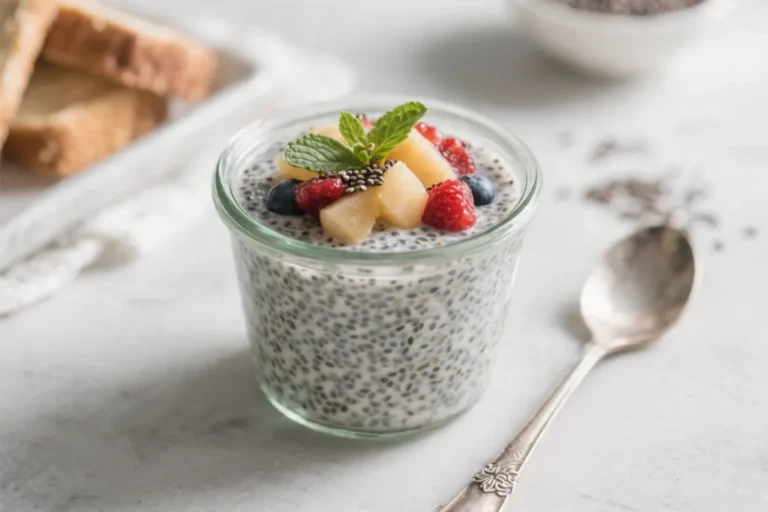
Easy Frozen Peanut Butter Yogurt Bites Ready in Minutes – A Quick, Creamy Snack
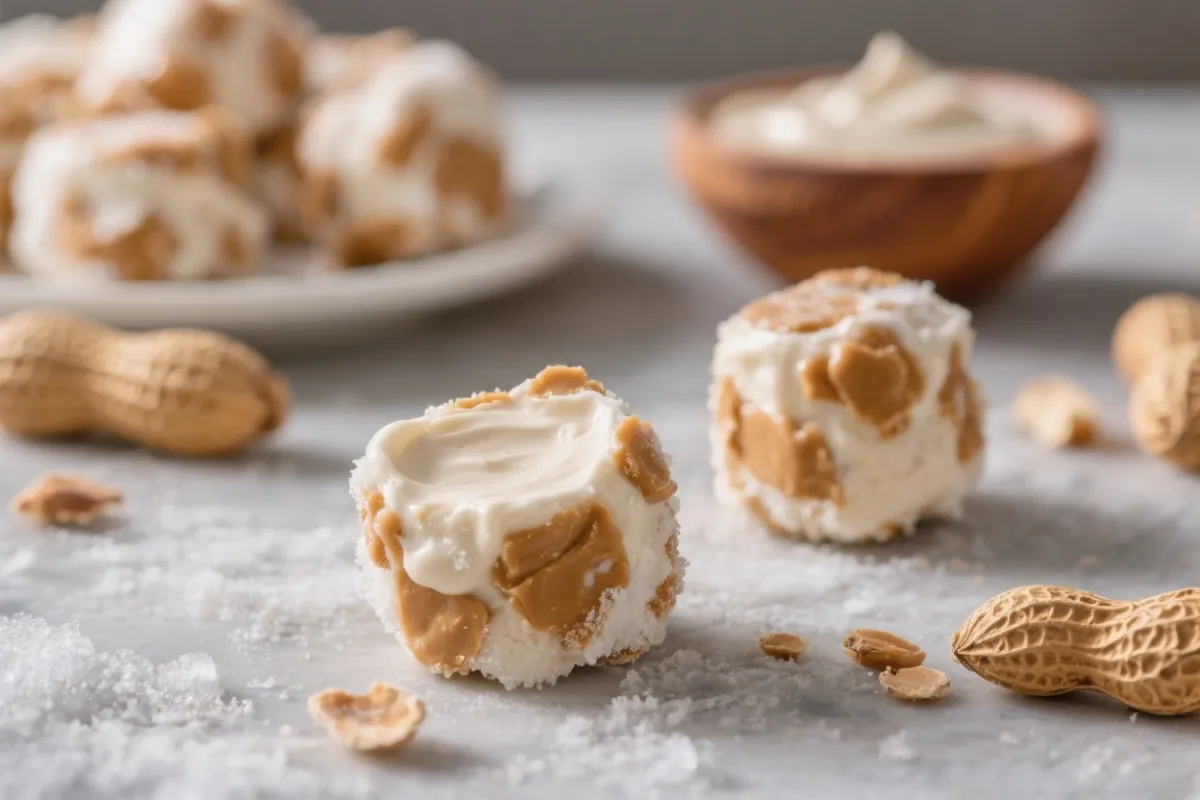
These frozen peanut butter yogurt bites are the kind of snack you’ll want on repeat. They’re creamy, lightly sweet, and ready with just a few minutes of hands-on time. No baking, no fuss—just mix, spoon, and freeze.
Keep a batch in your freezer for midday cravings, lunchbox treats, or a quick dessert that doesn’t feel heavy. If you love peanut butter cups and tangy yogurt, this is your sweet spot.
Why This Recipe Works
Frozen yogurt gets a luscious texture when blended with creamy peanut butter, creating a bite that’s both smooth and satisfying. A touch of honey or maple syrup balances the tang of yogurt without making it too sweet.
A pinch of salt sharpens the flavors and keeps the peanut butter from tasting flat. You can customize the bites with chocolate, fruit, or crunch, and they still set up beautifully. Best of all, they portion easily, so you get built-in portion control with zero guesswork.
What You’ll Need
- Plain Greek yogurt (2% or whole milk works best for creaminess) – about 1 cup
- Peanut butter (creamy, natural or regular) – 1/2 cup
- Honey or maple syrup – 2–3 tablespoons, to taste
- Vanilla extract – 1/2 teaspoon
- Pinch of salt – optional but recommended
- Mini chocolate chips or chopped dark chocolate – 2–3 tablespoons (optional)
- Silicone mold, mini muffin tin, or parchment-lined tray
- Small cookie scoop or spoon
How to Make It
- Stir the base: In a medium bowl, whisk the Greek yogurt, peanut butter, honey (or maple), vanilla, and a pinch of salt until smooth and fully combined.
Taste and adjust sweetness.
- Add mix-ins (optional): Fold in mini chocolate chips or chopped dark chocolate. You can also keep them plain and add a drizzle later.
- Prep the mold: Arrange a silicone mold or mini muffin tin on a small baking sheet for stability. If using a tray, line it with parchment.
- Portion: Use a small scoop or spoon to drop tablespoon-sized mounds into each cavity or onto the lined tray.
Aim for even sizes so they freeze uniformly.
- Tidy up: Smooth the tops with the back of the spoon. If you’d like, sprinkle a few extra chips or a tiny pinch of flaky salt on top.
- Freeze: Place the tray in the freezer and chill for 1–2 hours, or until the bites are firm enough to release cleanly.
- Release and store: Pop the bites out of the mold. If using a tray, peel them off the parchment.
Transfer to a freezer-safe container or bag, with parchment between layers to prevent sticking.
- Serve: Let a bite sit at room temperature for 2–5 minutes to soften slightly before eating for the creamiest texture.
Keeping It Fresh
Store your bites in an airtight container in the freezer for up to 2 months. Layer parchment between stacks to avoid clumping. If you notice frost, transfer them to a fresh, smaller container to reduce air exposure.
For grab-and-go ease, wrap individual bites in small squares of parchment before freezing.
Why This is Good for You
- Protein-packed: Greek yogurt and peanut butter deliver a steady, satisfying boost of protein.
- Healthy fats: Peanut butter adds mono- and polyunsaturated fats that help keep you full.
- Lower in added sugar: You control the sweetener and amount, so it’s easy to keep these balanced.
- Portion-friendly: Bite-sized pieces make mindful snacking simple—no second-guessing serving sizes.
What Not to Do
- Don’t use fat-free yogurt if you want creamy bites. It tends to freeze icy. Choose 2% or whole.
- Don’t skip the pinch of salt. It makes the peanut butter taste richer and rounder.
- Don’t overload with mix-ins. Too many chocolate chips or nuts can make the bites crumble.
- Don’t freeze in a warm kitchen. If your mixture sits out too long before freezing, it can separate.
Work quickly.
- Don’t expect instant softness. Give them a few minutes at room temp to reach the perfect texture.
Variations You Can Try
- PB&J Swirl: Spoon a tiny swirl of strawberry or raspberry jam into each bite before freezing.
- Chocolate Shell: After freezing, dip the tops in melted dark chocolate and refreeze for 10 minutes.
- Banana Bread Vibes: Fold in mashed ripe banana and a pinch of cinnamon; add crushed walnuts if you like.
- Crunch Factor: Sprinkle crushed pretzels or toasted coconut on top for salty-sweet contrast.
- Almond or Cashew Twist: Swap peanut butter for almond or cashew butter and add a drizzle of honey on top.
- High-Protein Boost: Whisk in 1–2 tablespoons of unflavored or vanilla protein powder; add a splash of milk if too thick.
- Dairy-Free Option: Use thick coconut yogurt and a creamy peanut butter for a lactose-free version.
FAQ
Can I use regular yogurt instead of Greek yogurt?
Yes, but strain it first or expect a softer, slightly icier texture. Greek yogurt’s thickness gives the best creamy result.
What kind of peanut butter works best?
Creamy peanut butter, either natural or conventional, works well. If using natural peanut butter, stir it thoroughly so the oil is fully incorporated before mixing.
How sweet should I make them?
Start with 2 tablespoons of honey or maple syrup, taste, and add more if needed.
The sweetness dulls a bit once frozen, so slightly sweeter than you think is usually perfect.
How long do they take to freeze?
About 1–2 hours depending on size and your freezer temperature. Mini muffin-sized bites usually set in roughly 90 minutes.
Can I add protein powder?
Absolutely. Add 1–2 tablespoons and, if the mixture gets too thick, loosen it with a splash of milk or almond milk until smooth.
Do they melt quickly?
They soften within a few minutes but won’t melt into a mess right away.
For the best texture, enjoy them 2–5 minutes after pulling from the freezer.
Are they good for kids?
Yes, as long as there are no peanut or dairy allergies. You can make them smaller and reduce the sweetener for a more kid-friendly snack.
How can I make them look neat without a mold?
Use a parchment-lined tray and a small cookie scoop for uniform mounds. Smooth the tops with a spoon dipped in warm water.
Can I make them without sweetener?
Yes, though they’ll taste tangier.
A splash of vanilla and a sprinkle of mini chocolate chips can help balance the flavor without liquid sweeteners.
What if they stick to the mold?
Silicone molds release best. If they still stick, let the mold sit at room temperature for 2–3 minutes, then push from the bottom to pop them out cleanly.
Final Thoughts
These frozen peanut butter yogurt bites are the kind of treat that checks every box: fast, creamy, customizable, and easy to stash for later. With just a few pantry staples and a couple of minutes, you’ve got a snack that feels special but stays sensible.
Keep a container in your freezer and you’ll always have something sweet, protein-packed, and ready when cravings hit. Simple ingredients, big payoff—exactly how a weekday treat should be.
Easy Frozen Peanut Butter Yogurt Bites Ready in Minutes - A Quick, Creamy Snack
Ingredients
Method
- Stir the base: In a medium bowl, whisk the Greek yogurt, peanut butter, honey (or maple), vanilla, and a pinch of salt until smooth and fully combined. Taste and adjust sweetness.
- Add mix-ins (optional): Fold in mini chocolate chips or chopped dark chocolate. You can also keep them plain and add a drizzle later.
- Prep the mold: Arrange a silicone mold or mini muffin tin on a small baking sheet for stability. If using a tray, line it with parchment.
- Portion: Use a small scoop or spoon to drop tablespoon-sized mounds into each cavity or onto the lined tray. Aim for even sizes so they freeze uniformly.
- Tidy up: Smooth the tops with the back of the spoon. If you’d like, sprinkle a few extra chips or a tiny pinch of flaky salt on top.
- Freeze: Place the tray in the freezer and chill for 1–2 hours, or until the bites are firm enough to release cleanly.
- Release and store: Pop the bites out of the mold. If using a tray, peel them off the parchment. Transfer to a freezer-safe container or bag, with parchment between layers to prevent sticking.
- Serve: Let a bite sit at room temperature for 2–5 minutes to soften slightly before eating for the creamiest texture.
Printable Recipe Card
Want just the essential recipe details without scrolling through the article? Get our printable recipe card with just the ingredients and instructions.