Homemade Strawberry Jam Recipe Canning – Simple, Fresh, and Safe
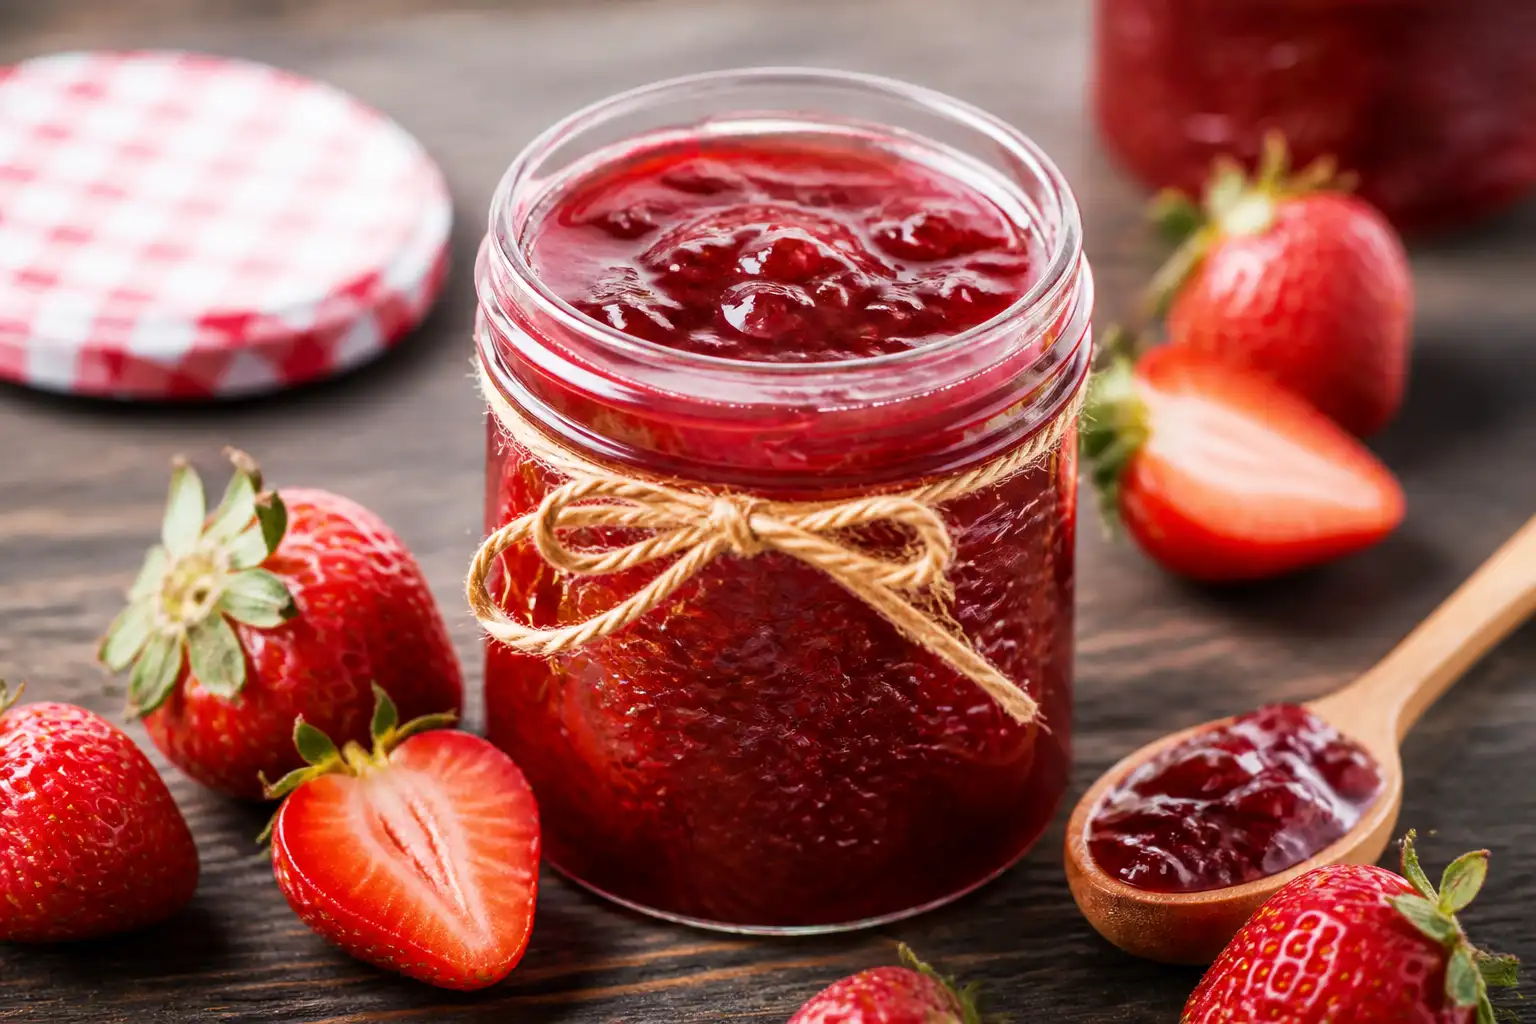
Sweet, bright, and full of real fruit, homemade strawberry jam is one of those small joys that tastes like summer. Canning it means you can enjoy that flavor all year long. If you’ve never canned before, don’t worry—this method is straightforward and uses basic pantry tools.
You’ll end up with a shelf-stable jam that’s perfect for toast, yogurt, or gifting. Ready to stock your pantry with something you’ll be proud of?
What Makes This Special
This homemade jam recipe keeps the focus on strawberries. You’ll get a soft set with a clean, fresh flavor—no heavy additives.
It uses tried-and-true water bath canning, which is safe for high-acid fruit like strawberries when done correctly. Plus, the process is beginner-friendly, and the results are reliably delicious.
Ingredients
- 4 pounds fresh strawberries, hulled and roughly chopped (about 10–12 cups prepared fruit)
- 4 cups granulated sugar (you can reduce slightly, but see Alternatives below)
- 1/4 cup bottled lemon juice (for reliable acidity)
- 1 packet (1.75 oz) powdered fruit pectin (classic/regular, not low-sugar)
- 1/2 teaspoon unsalted butter (optional, reduces foaming)
Equipment: 6–7 half-pint canning jars with lids and bands, large pot or water bath canner, jar lifter, canning funnel, ladle, clean towels.
Instructions
- Prep the jars and canner: Wash jars, lids, and bands in hot, soapy water. Rinse well.Place jars in a canner or large pot, cover with water, and bring to a simmer to keep hot. Keep lids handy (follow the manufacturer’s prep instructions).
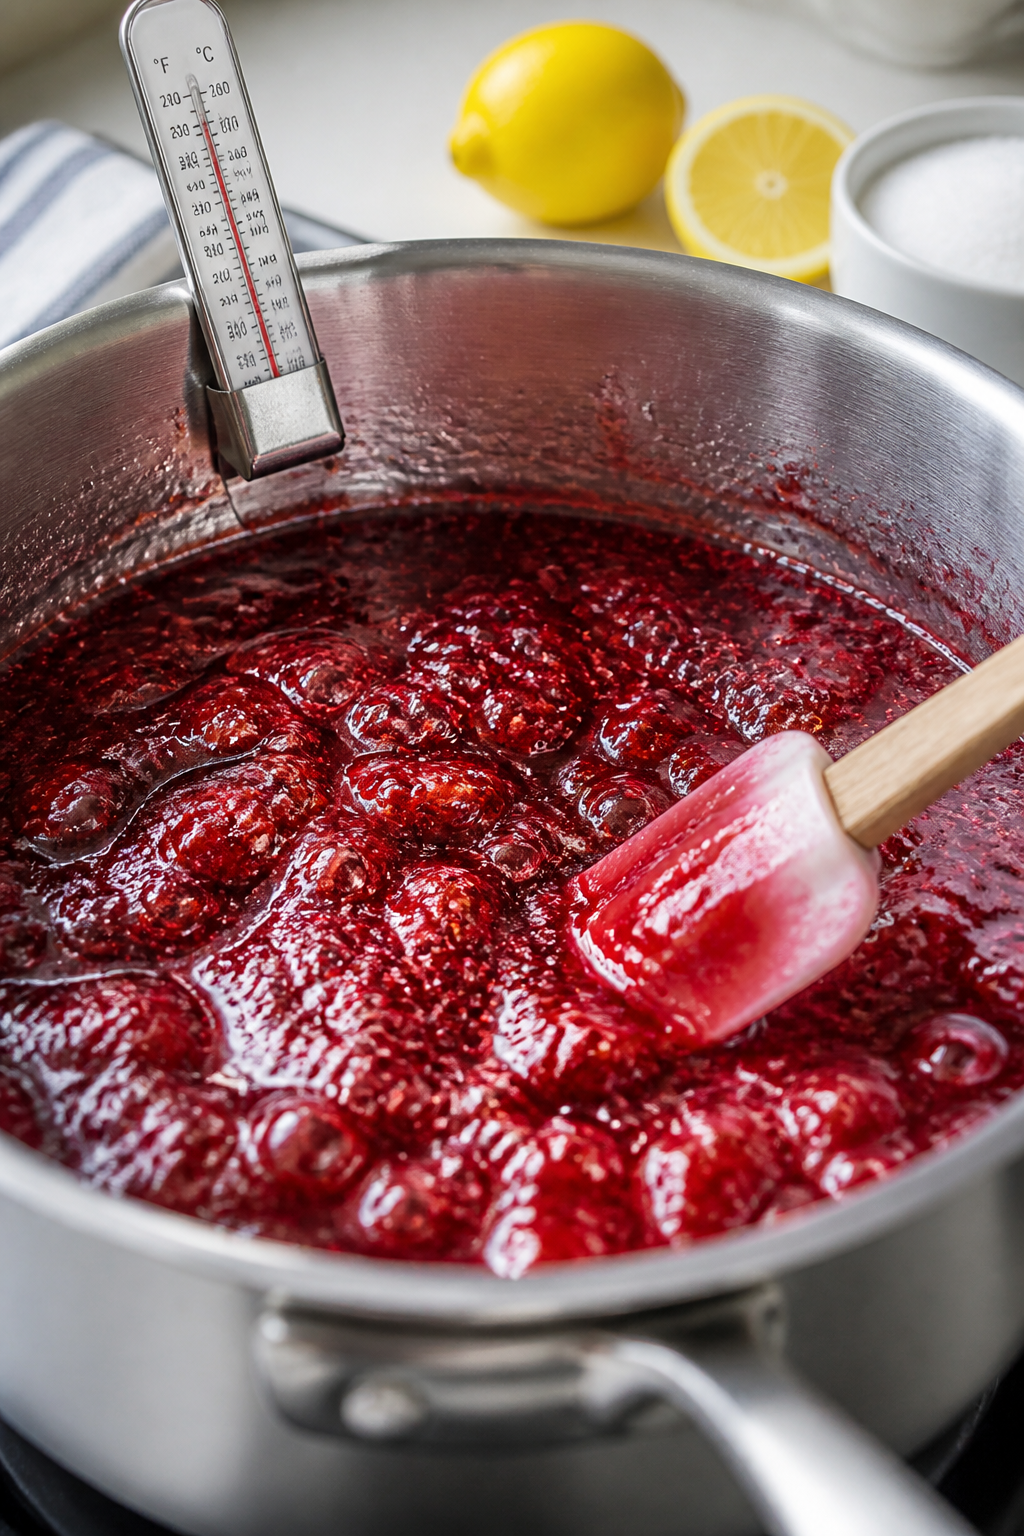
- Mash the berries: In a wide, heavy pot, lightly mash the strawberries to release juices. You should have about 8 cups of mashed fruit.Stir in the bottled lemon juice.
- Mix in pectin: Whisk the powdered pectin into the fruit until fully dissolved. Add the optional butter to help reduce foam.
- Bring to a rolling boil: Heat over medium-high, stirring often, until the mixture reaches a full rolling boil that doesn’t stop when stirred.
- Add sugar: Pour in all the sugar at once. Stir constantly to dissolve.Return to a full rolling boil and boil hard for 1 minute. Skim any foam if needed.
- Test the set (optional): Spoon a bit on a chilled plate. Wait 30 seconds and nudge it.If it wrinkles slightly, it’s set. If not, boil another 30–60 seconds.
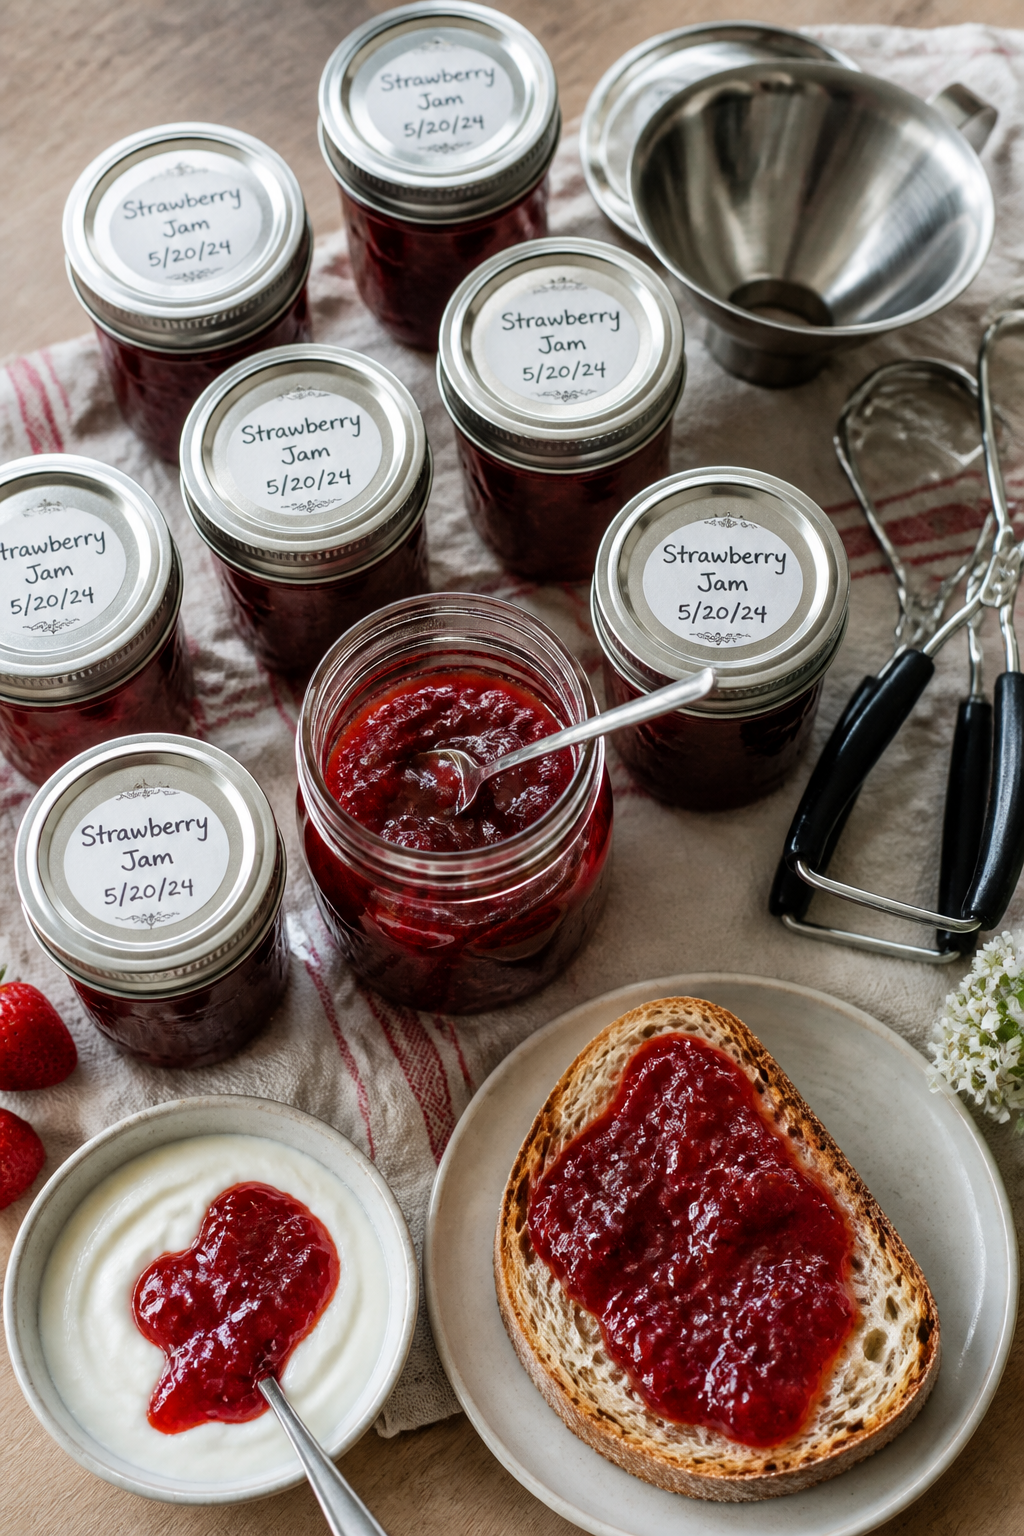
- Fill the jars: Remove hot jars from the canner and place on a towel. Using a funnel, ladle hot jam into jars, leaving 1/4 inch headspace.Wipe rims clean with a damp cloth.
- Lid and band: Place lids on jars and screw bands to fingertip tight (snug, not cranked down).
- Process in water bath: Return filled jars to the canner, ensuring they’re covered by at least 1–2 inches of water. Bring to a boil and process for 10 minutes (adjust for altitude if needed: add 5 minutes for 1,001–6,000 ft; add 10 minutes above 6,000 ft).
- Cool and check seals: Turn off heat, let jars rest in the water 5 minutes. Remove to a towel-lined counter.Let sit undisturbed 12–24 hours. Check lids—they should be concave and firm when pressed.
- Label: Wipe jars, remove bands if you like, and label with the date and contents.
How to Store
- Sealed jars: Store in a cool, dark place for up to 12–18 months for best quality.
- After opening: Refrigerate and use within 3–4 weeks.
- If a jar didn’t seal: Refrigerate right away and use within a few weeks, or reprocess within 24 hours using a new lid.
Health Benefits
Strawberries bring vitamin C, fiber, and antioxidants like anthocyanins. While jam does include sugar, you still get fruit compounds that support heart health and immunity.
A small spoonful can brighten breakfast without overdoing it. Pair with whole-grain toast or yogurt for a more balanced snack.
What Not to Do
- Don’t skip bottled lemon juice: It ensures consistent acidity for safe canning.
- Don’t change jar sizes without adjusting time: Half-pints and pints process differently.
- Don’t guess headspace: Too much or too little can affect seals and texture.
- Don’t can overripe or moldy fruit: Start with fresh, sound berries for safety and flavor.
- Don’t invert jars to seal: Use a proper water bath for reliable, safe seals.
Alternatives
- Low-sugar version: Use low- or no-sugar pectin and follow the pectin brand’s sugar ratios. Do not simply cut sugar with regular pectin.
- No pectin option: Cook longer to reduce water and thicken naturally.Flavor will be deeper, and yield smaller. Add extra lemon juice for brightness and set.
- Flavor twists: Add 1–2 teaspoons vanilla, a splash of balsamic, or a few crushed black peppercorns for a subtle kick. Stir in after boiling.
- Frozen strawberries: Thaw and drain excess liquid first.Measure fruit after thawing for accuracy.
FAQ
Can I use honey instead of sugar?
Yes, but use a low-sugar pectin that allows alternative sweeteners. Honey changes flavor and set, so follow the pectin brand’s instructions for best results.
Why bottled lemon juice and not fresh?
Bottled lemon juice has a consistent acid level, which supports safe canning. Fresh lemons vary in acidity, and that uncertainty isn’t ideal for shelf stability.
My jam is runny.
Can I fix it?
Yes. Wait 24 hours first—jams often firm up. If still loose, re-cook with a bit more pectin and a splash of lemon juice, then reprocess in jars.
How many jars will this make?
Typically 6–7 half-pints, depending on how juicy your berries are and how long you boil.
Do I need to sterilize the jars first?
If you process for at least 10 minutes, pre-sterilizing isn’t required.
Just start with clean, hot jars and proper processing.
In Conclusion
With a few simple steps, you can turn peak-season strawberries into jars of bright, homemade jam that keep beautifully. Stick to the timing, mind the acidity, and you’ll get a safe, consistent set. Once you taste your own jam on warm toast, you’ll wonder why you ever bought it.
Happy canning and enjoy the sweetness year-round!
Ingredients
Method
- Prep the jars and canner: Wash jars, lids, and bands in hot, soapy water. Rinse well. Place jars in a canner or large pot, cover with water, and bring to a simmer to keep hot. Keep lids handy (follow the manufacturer’s prep instructions).
- Mash the berries: In a wide, heavy pot, lightly mash the strawberries to release juices. You should have about 8 cups of mashed fruit. Stir in the bottled lemon juice.
- Mix in pectin: Whisk the powdered pectin into the fruit until fully dissolved. Add the optional butter to help reduce foam.
- Bring to a rolling boil: Heat over medium-high, stirring often, until the mixture reaches a full rolling boil that doesn’t stop when stirred.
- Add sugar: Pour in all the sugar at once. Stir constantly to dissolve. Return to a full rolling boil and boil hard for 1 minute. Skim any foam if needed.
- Test the set (optional): Spoon a bit on a chilled plate. Wait 30 seconds and nudge it. If it wrinkles slightly, it’s set. If not, boil another 30–60 seconds.
- Fill the jars: Remove hot jars from the canner and place on a towel. Using a funnel, ladle hot jam into jars, leaving 1/4 inch headspace. Wipe rims clean with a damp cloth.
- Lid and band: Place lids on jars and screw bands to fingertip tight (snug, not cranked down).
- Process in water bath: Return filled jars to the canner, ensuring they’re covered by at least 1–2 inches of water. Bring to a boil and process for 10 minutes (adjust for altitude if needed: add 5 minutes for 1,001–6,000 ft; add 10 minutes above 6,000 ft).
- Cool and check seals: Turn off heat, let jars rest in the water 5 minutes. Remove to a towel-lined counter. Let sit undisturbed 12–24 hours. Check lids—they should be concave and firm when pressed.
- Label: Wipe jars, remove bands if you like, and label with the date and contents.
Printable Recipe Card
Want just the essential recipe details without scrolling through the article? Get our printable recipe card with just the ingredients and instructions.