Cookie Dough Truffles No Bake – Easy, Safe, and Irresistible Bites
These no-bake cookie dough truffles taste like childhood nostalgia wrapped in a glossy chocolate shell. They’re sweet, soft, and studded with chocolate chips—without any raw eggs or raw flour. You can make them with pantry staples and chill them while you clean up.
Perfect for parties, gifting, or weeknight treats, they’re impressive without the fuss. If you love cookie dough but don’t want to turn on the oven, this is your new go-to.
Why This Recipe Works
- No raw eggs or raw flour: We use heat-treated flour and no eggs, so the dough is safe to eat.
- Buttery, classic cookie dough flavor: Brown sugar and vanilla give that authentic cookie dough taste.
- Great texture: Chilling firms the centers, while the chocolate shell adds a satisfying snap.
- Make-ahead friendly: The truffles keep well in the fridge or freezer, so you can prep in advance.
- Customizable: Switch up the mix-ins, chocolate coating, or drizzle to match any occasion.
Ingredients
- 1 1/4 cups all-purpose flour, heat-treated (see instructions below)
- 1/2 cup unsalted butter, softened
- 1/2 cup packed light brown sugar
- 1/4 cup granulated sugar
- 1 1/2 teaspoons vanilla extract
- 1/4 teaspoon fine salt
- 2–3 tablespoons milk or cream (as needed for texture)
- 2/3 cup mini chocolate chips (plus extra for garnish, optional)
- 12 ounces chocolate for coating (dark, milk, or semisweet baking chocolate or candy melts)
- 1 teaspoon coconut oil or neutral oil (optional, to thin the coating)
- Flaky sea salt for topping (optional)
How to Make It
- Heat-treat the flour: Spread the flour on a baking sheet and bake at 300°F (150°C) for 5–7 minutes, stirring once, until it reaches 165°F throughout. Let it cool completely.
Alternatively, microwave in 30-second bursts, stirring between, until it reaches 165°F. Cool before using.
- Cream the butter and sugars: In a mixing bowl, beat softened butter with brown sugar and granulated sugar until light and fluffy, about 2 minutes.
- Add vanilla and salt: Mix in the vanilla extract and salt until combined.
- Add flour: Sift or sprinkle the cooled, heat-treated flour into the bowl. Mix on low until mostly combined.
The mixture will look crumbly at first.
- Adjust texture: Add milk or cream 1 tablespoon at a time until the dough holds together and feels like soft cookie dough. You may not need all the liquid.
- Fold in chips: Stir in the mini chocolate chips until evenly distributed.
- Chill the dough: Cover and refrigerate for 20–30 minutes to firm up. This makes rolling easier.
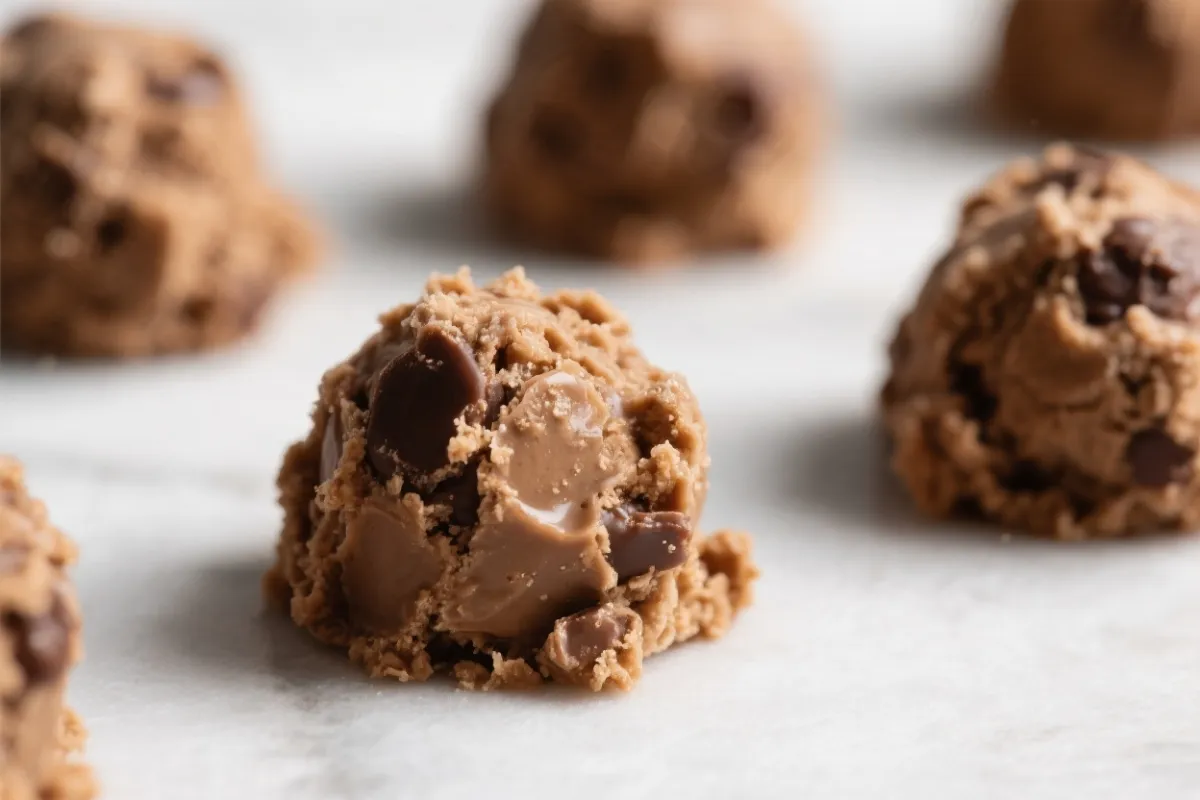
- Roll into balls: Scoop 1 tablespoon portions and roll into smooth balls.
Place on a parchment-lined sheet. Chill again for 15–20 minutes.
- Melt the coating: In a microwave-safe bowl, melt the chocolate in 20–30 second bursts, stirring between, until smooth. Add a teaspoon of oil if you want a thinner coating.
- Dip the truffles: Using a fork or dipping tool, lower each chilled ball into the chocolate.
Tap off excess on the bowl’s edge. Place back on parchment.
- Finish and set: While still wet, garnish with a few mini chips or a pinch of flaky sea salt if you like. Let set at room temp or refrigerate for 10–15 minutes until firm.
- Serve: Enjoy straight from the fridge for a firm bite or let them sit out 5–10 minutes for a softer center.
How to Store
- Refrigerator: Keep in an airtight container for up to 1 week.
Layer with parchment to prevent sticking.
- Freezer: Freeze up to 2 months. Thaw in the fridge for best texture.
- Room temperature: For parties, they can sit out 2–3 hours in a cool room. Avoid hot, sunny spots to prevent melting.
Benefits of This Recipe
- Fast and no-bake: Great for hot days, dorms, or when you don’t want to preheat an oven.
- Kid-friendly and party-ready: Simple steps, fun dipping, and easy to decorate.
- Budget-conscious: Uses basic pantry items with a bakery-style finish.
- Scalable: Double for a crowd or halve for a small batch without fuss.
- Diet-flexible: Easy swaps for gluten-free or dairy-free versions (see variations).
What Not to Do
- Don’t skip heat-treating the flour: Raw flour isn’t safe to eat.
This quick step matters.
- Don’t rush the chilling: Warm dough will fall apart in the chocolate and create a mess.
- Don’t over-thin the coating: Too much oil makes a soft, streaky shell. Start with 1 teaspoon.
- Don’t use large chocolate chips inside: Mini chips distribute better and make rolling easier.
- Don’t overheat the chocolate: Scorched chocolate turns thick and grainy. Short bursts and stirring are key.
Recipe Variations
- Gluten-free: Use a 1:1 gluten-free baking flour and heat-treat it the same way.
Check chocolate labels for gluten cross-contamination if needed.
- Dairy-free/Vegan: Swap butter with vegan butter, use plant milk, and choose dairy-free chocolate. The texture stays similar.
- Peanut butter swirl: Beat 2–3 tablespoons creamy peanut butter into the dough; coat with milk chocolate and top with crushed peanuts.
- Funfetti: Replace chocolate chips with rainbow jimmies and coat with white chocolate. Add a sprinkle finish.
- Mocha: Dissolve 1 teaspoon instant espresso in the milk before adding.
Finish with dark chocolate and a cocoa dusting.
- Salted caramel: Fold in soft caramel bits and a pinch of flaky salt; use semisweet coating and extra salt on top.
- Cookie crumbs: Mix in crushed Oreos or graham crackers for crunch. Coat with dark chocolate and add a crumb garnish.
FAQ
How do I heat-treat flour without a thermometer?
If you don’t have a thermometer, bake the flour at 300°F for 7–8 minutes, stirring once halfway. Let it cool fully.
It should feel dry and slightly toasty but not browned.
My dough is crumbly. What should I do?
Add milk a teaspoon at a time and mix until the dough holds together. It should be soft but not sticky.
Chilling will firm it up further.
Can I skip the chocolate coating?
Yes. Roll the chilled balls in cocoa powder, powdered sugar, or finely chopped nuts. The coating adds structure and polish, but it’s optional.
Why did my chocolate get streaky or dull?
Moisture or overheating can cause streaks.
Make sure the truffles are well chilled and dry, and melt the chocolate slowly. Using candy melts or adding a little oil can help keep it smooth.
Can I make these nut-free?
Absolutely. The base recipe is nut-free.
Just check your chocolate chips and coating to ensure they’re made in a nut-free facility if allergies are severe.
What size should I roll the truffles?
Aim for about 1 tablespoon each, roughly 1 inch in diameter. Smaller balls are easier to dip and give a good chocolate-to-dough ratio.
How can I make them look professional?
Dip with a fork, tap off excess, and add a neat drizzle: spoon a little melted chocolate into a zip-top bag, snip a tiny corner, and pipe thin lines across the set truffles. A pinch of flaky salt or a few mini chips on top also helps.
Can I add protein powder?
You can add 1–2 tablespoons of a neutral or vanilla protein powder.
If the dough dries out, add an extra splash of milk to balance the texture.
Do they need to be refrigerated?
For best texture and freshness, yes. Store them chilled and bring to room temp for 5–10 minutes before serving if you prefer a softer bite.
Final Thoughts
These cookie dough truffles are simple, safe, and endlessly customizable. With a few pantry staples and a quick chill, you’ll have a giftable treat that looks bakery-made and tastes like pure comfort.
Keep a batch in the freezer for last-minute desserts or weeknight cravings. Once you try them, you’ll wonder why you ever bothered turning on the oven.
Ingredients
Method
- Heat-treat the flour: Spread the flour on a baking sheet and bake at 300°F (150°C) for 5–7 minutes, stirring once, until it reaches 165°F throughout. Let it cool completely. Alternatively, microwave in 30-second bursts, stirring between, until it reaches 165°F. Cool before using.
- Cream the butter and sugars: In a mixing bowl, beat softened butter with brown sugar and granulated sugar until light and fluffy, about 2 minutes.
- Add vanilla and salt: Mix in the vanilla extract and salt until combined.
- Add flour: Sift or sprinkle the cooled, heat-treated flour into the bowl. Mix on low until mostly combined. The mixture will look crumbly at first.
- Adjust texture: Add milk or cream 1 tablespoon at a time until the dough holds together and feels like soft cookie dough. You may not need all the liquid.
- Fold in chips: Stir in the mini chocolate chips until evenly distributed.
- Chill the dough: Cover and refrigerate for 20–30 minutes to firm up. This makes rolling easier.
- Roll into balls: Scoop 1 tablespoon portions and roll into smooth balls. Place on a parchment-lined sheet. Chill again for 15–20 minutes.
- Melt the coating: In a microwave-safe bowl, melt the chocolate in 20–30 second bursts, stirring between, until smooth. Add a teaspoon of oil if you want a thinner coating.
- Dip the truffles: Using a fork or dipping tool, lower each chilled ball into the chocolate. Tap off excess on the bowl’s edge. Place back on parchment.
- Finish and set: While still wet, garnish with a few mini chips or a pinch of flaky sea salt if you like. Let set at room temp or refrigerate for 10–15 minutes until firm.
- Serve: Enjoy straight from the fridge for a firm bite or let them sit out 5–10 minutes for a softer center.
Printable Recipe Card
Want just the essential recipe details without scrolling through the article? Get our printable recipe card with just the ingredients and instructions.