Mini Cannoli Cups

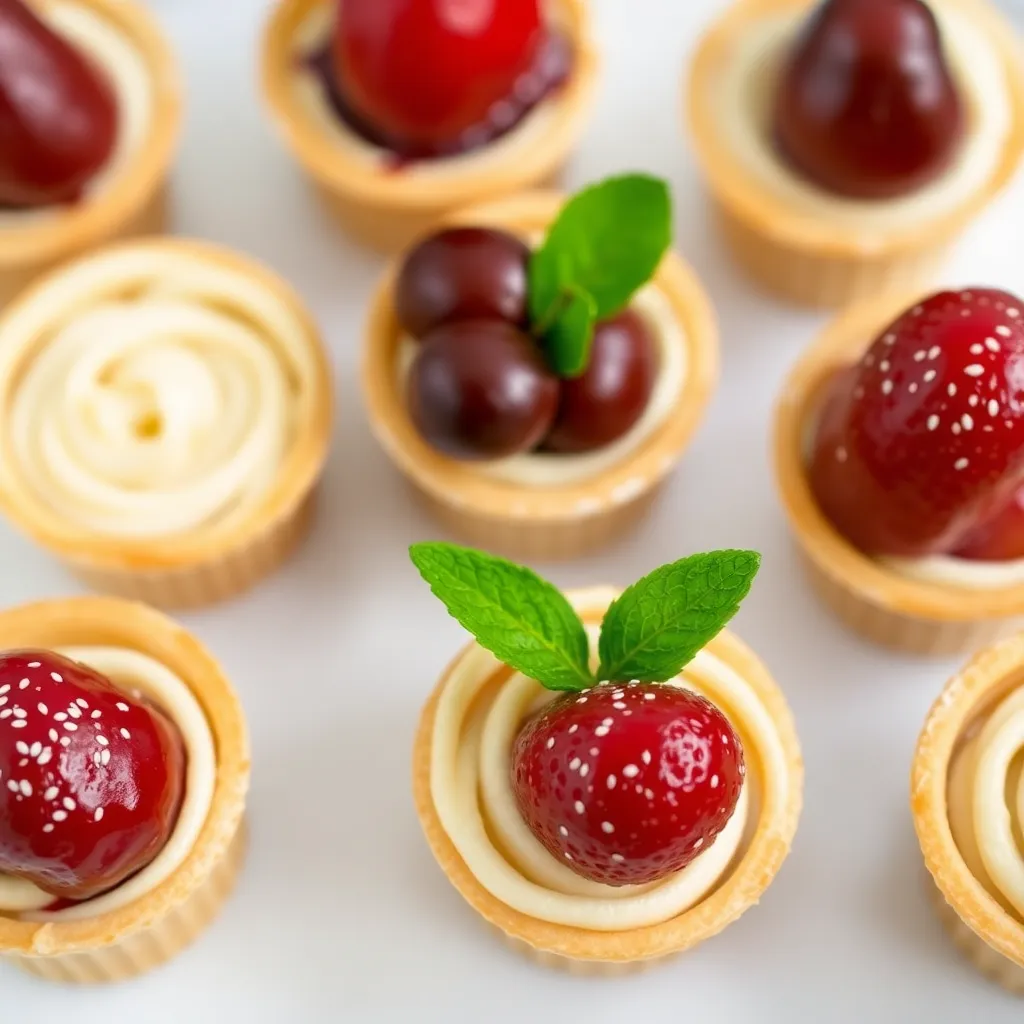
There’s something downright irresistible about a crisp, golden shell filled with sweet, creamy ricotta—especially when it’s bite-sized and party-ready. Mini Cannoli Cups bring the beloved flavors of traditional cannoli to an easy, crowd-pleasing dessert that skips the deep-fry and the fuss. With buttery pastry shells baked in mini muffin tins and a luscious ricotta filling flecked with chocolate and citrus, these handheld treats feel special yet come together with pantry-friendly shortcuts. Whether you’re hosting a holiday, bringing dessert to a potluck, or simply craving a little Italian-inspired sweetness after dinner, these mini cups check every box: fun to make, easy to serve, and impossible to eat just one.
Why You’ll Love This Recipe

- No frying required: Get all the cannoli charm without oil splatter or special equipment.
- Perfectly portioned: Bite-sized cups make serving and sharing effortless.
- Make-ahead friendly: Prep components in advance and assemble just before serving for peak crunch.
- Balanced flavor: Lightly sweet ricotta filling with hints of orange, vanilla, and cinnamon.
- Customizable: Swap chocolate chips for pistachios, add candied citrus, or drizzle with melted chocolate.
Ingredients

- 1 package refrigerated pie crusts (two 9-inch rounds), thawed per package directions
- 1 large egg, beaten (for egg wash)
- 2 tablespoons granulated sugar (for dusting crust)
- 1/2 teaspoon ground cinnamon (optional, for dusting crust)
- 1 1/2 cups whole-milk ricotta cheese, drained well
- 4 ounces cream cheese, softened
- 1/2 cup powdered sugar, plus more to taste
- 1 teaspoon pure vanilla extract
- 1/2 teaspoon orange zest (or lemon zest), finely grated
- 1/4 teaspoon ground cinnamon (for filling)
- 1/8 teaspoon kosher salt
- 1/3 cup mini chocolate chips
- 1/4 cup finely chopped pistachios (optional)
- Powdered sugar, for dusting
- Maraschino cherries or candied orange peel, for garnish (optional)
- Nonstick baking spray or butter, for greasing the muffin tin
Step-by-Step Instructions
- Drain the ricotta: Line a fine-mesh sieve with cheesecloth or a coffee filter and set it over a bowl. Add the ricotta and refrigerate for 1–2 hours to remove excess moisture. This is key to a thick, pipeable filling.
- Preheat and prep: Heat the oven to 400°F (200°C). Lightly grease a 24-cup mini muffin tin with baking spray or butter.
- Prepare the crusts: Unroll the pie crusts onto a lightly floured surface. If desired, mix 2 tablespoons granulated sugar with 1/2 teaspoon cinnamon and sprinkle evenly over the crusts. Gently roll once or twice with a rolling pin to help the sugar adhere.
- Cut and shape: Use a 2.5-inch round cutter (or a glass) to cut circles from the crusts. Reroll scraps as needed to get about 24 rounds. Press each round gently into the mini muffin cups to form a shallow shell, making sure the dough is snug against the bottom and sides.
- Dock and brush: Prick the bottoms of the shells with a fork to prevent puffing. Brush lightly with beaten egg for shine and extra crispness.
- Bake the cups: Bake for 10–12 minutes, or until golden brown and crisp. Rotate the pan halfway through for even browning. Let the cups cool in the pan for 5 minutes, then transfer to a wire rack to cool completely.
- Make the filling: In a mixing bowl, beat the softened cream cheese until smooth. Add the drained ricotta, powdered sugar, vanilla, orange zest, cinnamon, and salt. Beat until creamy and well combined, 1–2 minutes. Taste and adjust sweetness if desired.
- Fold in mix-ins: Gently fold in the mini chocolate chips and, if using, half of the pistachios.
- Chill to set: Cover and refrigerate the filling for at least 30 minutes to firm up, which makes piping easier and helps the cups stay crisp longer.
- Assemble: Spoon the filling into a piping bag fitted with a large star or round tip (or use a zip-top bag with the corner snipped). Pipe a generous swirl of filling into each cooled pastry cup.
- Garnish and serve: Sprinkle with the remaining pistachios, dust with powdered sugar, and top with a small piece of cherry or candied peel if desired. Serve immediately for maximum crunch.
Tips for Success
- Drain thoroughly: Excess moisture is the enemy of crisp shells. If your ricotta seems wet, give it extra time to drain or gently press with the back of a spoon.
- Chill the filling: A cooler, firmer filling pipes beautifully and won’t weep into the cups as quickly.
- Use whole-milk ricotta: It’s creamier and more flavorful than part-skim. If you only have part-skim, add a touch more cream cheese for body.
- Sweetness to taste: Start with 1/2 cup powdered sugar, then adjust. Some ricottas are naturally sweeter; others can be tangier.
- Assemble last minute: Keep shells and filling separate until just before serving to preserve that signature crunch.
- Flavor twists: Swap vanilla for almond extract; fold in chopped dark chocolate, candied citrus, or toasted hazelnuts for variation.
- Gluten-free option: Use gluten-free pie dough or pre-made GF phyllo shells; bake times may vary slightly, so watch closely for golden edges.
Storage & Reheating
- Unfilled shells: Store cooled pastry cups in an airtight container at room temperature for up to 3 days. For extra insurance against staling, add a paper towel to absorb humidity.
- Filling: Refrigerate in a sealed container for up to 3 days. Stir before piping; if it loosens, whisk in a tablespoon of mascarpone or a bit more cream cheese.
- Assembled cups: Best eaten within 2–3 hours. If needed, refrigerate loosely covered up to 8 hours, but expect some softening.
- Recrisping shells: If shells lose crunch before filling, warm on a baking sheet at 325°F (165°C) for 5–7 minutes, then cool completely before assembling.
- Freezing: Freeze unfilled shells up to 1 month in a well-sealed container. Thaw at room temperature and recrisp briefly in the oven. Do not freeze the ricotta filling; it can become grainy.
Frequently Asked Questions
-
Can I use mascarpone instead of cream cheese?
Yes. Mascarpone lends a silkier, more delicate texture. Replace the cream cheese 1:1 and reduce powdered sugar slightly, as mascarpone can taste richer and sweeter.
-
What if I don’t have a round cutter?
Use a drinking glass or jar lid about 2.5 inches wide. If your cups are deeper, slightly larger rounds (up to 3 inches) will help you form neat shells.
-
How do I prevent soggy bottoms?
Drain ricotta thoroughly, bake shells until fully golden, and don’t assemble too far in advance. You can also brush the inside of cooled shells with a thin layer of melted chocolate and let set—this creates a moisture barrier and adds flavor.
-
Can I make these with phyllo or wonton wrappers?
Absolutely. Phyllo shells are a quick store-bought shortcut. For wonton wrappers, press into mini muffin cups, mist with oil, and bake at 375°F (190°C) for 8–10 minutes until crisp and browned.
With their crunchy shells, creamy filling, and playful garnishes, Mini Cannoli Cups deliver big flavor in a tiny package. They’re a smart, make-ahead dessert that looks impressive on a platter and disappears fast. Keep the components on hand and you’ll always have a party-ready treat at the ready—no deep fryer required.
Printable Recipe Card
Want just the essential recipe details without scrolling through the article? Get our printable recipe card with just the ingredients and instructions.