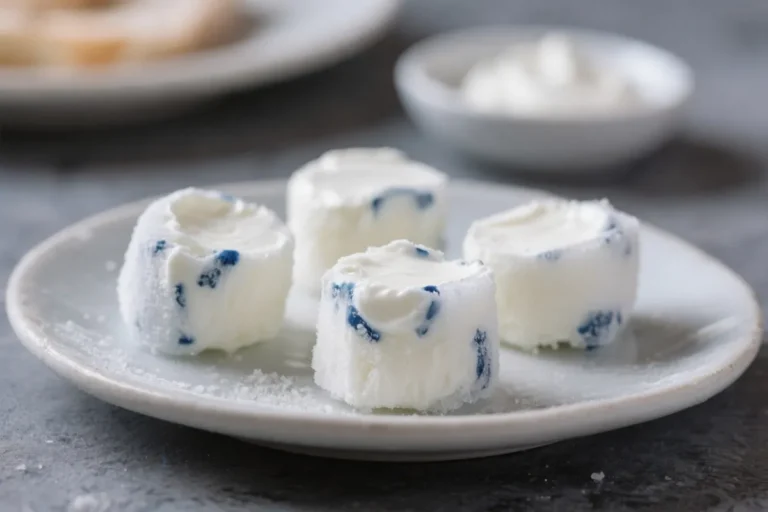
How to Make Beef Tallow at Home: The Complete Guide (Plus Recipes)
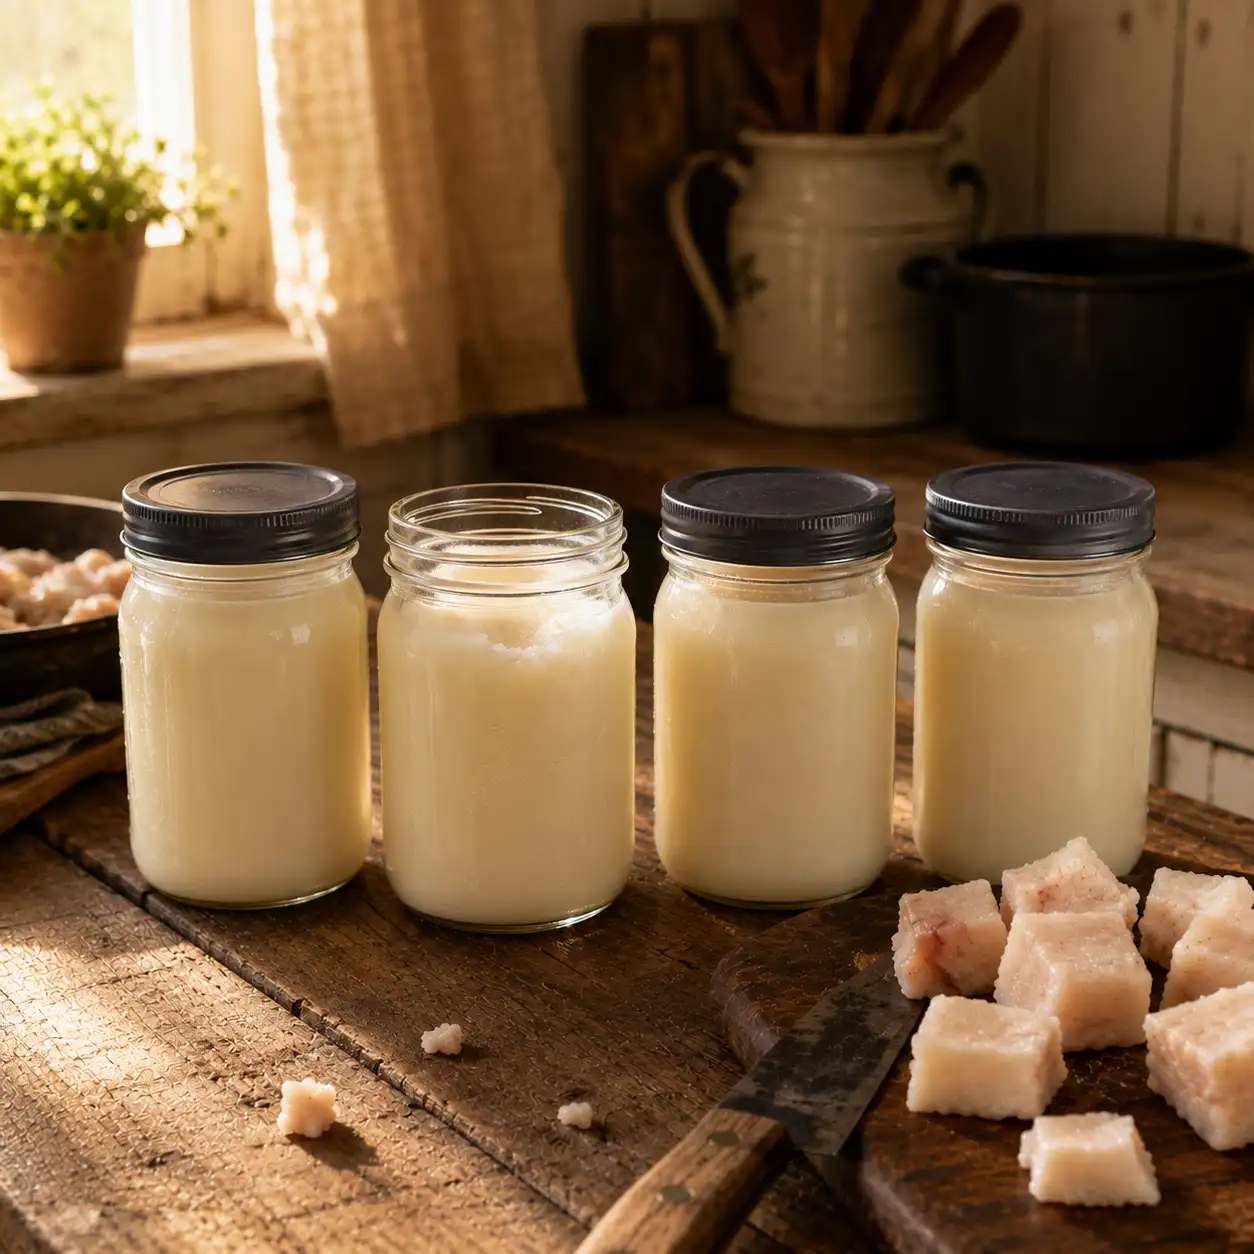
I’ve rendered probably 200+ pounds of beef fat over the last several years — some of it beautiful, snow-white and nearly odorless, and some of it that smelled like a barnyard and turned my kitchen into a smoke bomb. The difference almost never comes down to luck. It comes down to a handful of decisions most tutorials gloss over: which fat you start with, how hot you let it get, and how you finish and store it.
This guide covers the whole picture: how to make beef tallow from raw fat step by step, what making beef tallow at home actually looks like in practice, how to use beef tallow for cooking once you’ve got it, and a handful of simple beef tallow recipes to put it to work right away.
What Beef Tallow Actually Is
Beef tallow is rendered beef fat — fat that’s been slowly melted down and separated from the connective tissue, water, and protein bits (called “cracklings” or “gribenes” if you’re used to the schmaltz version) that would otherwise cause it to spoil. Once rendered and cooled, it sets into a smooth, ivory-to-white solid that behaves a lot like a firmer, more heat-stable version of coconut oil.
Beef tallow is one of those simple, old-fashioned ingredients that can be surprisingly useful around the kitchen. Once rendered, it can be used in place of butter, lard, or cooking oil in many recipes, especially when you want a deeper, richer flavor. It is excellent for frying potatoes, roasting vegetables, sautéing, searing meat, and adding extra richness to savory dishes. You can even use clean, well-rendered tallow for homemade baking recipes or turn it into other traditional products such as whipped tallow balm, soap, or candles. What makes tallow especially appealing is that it gives you a practical way to use beef fat that might otherwise be thrown away, turning it into a versatile ingredient you can keep on hand and use whenever a recipe calls for a little extra richness.
Chemically, it’s mostly saturated and monounsaturated fat, which is exactly why it’s so shelf-stable and why it holds up so well under high heat — unlike most vegetable and seed oils, tallow has very few polyunsaturated fats to oxidize. That heat stability is the main reason so many cooks are going back to beef tallow for cooking instead of reaching for canola or vegetable oil.
Related terms you’ll see used interchangeably (and what they actually mean):
- Suet — raw, unrendered beef fat, specifically from around the loins/kidneys
- Leaf fat — the highest-grade suet, from around the kidneys specifically
- Rendering — the process of melting fat to purify it (this is the “making” in “making beef tallow”)
- Cracklings — the crisp browned solids left over after rendering
- Grass-fed tallow — tallow from grass-finished cattle, generally higher in CLA and omega-3s
- Pemmican-grade tallow — very hard, very dry tallow rendered specifically for long-term shelf stability
Leaf Fat vs. Suet vs. Trim: Pick the Right Starting Material
This is the single biggest quality lever, and it’s the part most articles skip past in a sentence.
- Leaf fat — the fat that surrounds the kidneys — is the gold standard. It has the least connective tissue, renders the cleanest, and produces tallow with almost no beefy smell. If you can specifically ask your butcher for “leaf fat” or “kidney fat,” do it.
- Suet — the firm fat around the loins and other cuts — is the next best thing and what most home cooks actually get when they ask a butcher for “fat for rendering.” It’s very good, just slightly less refined than leaf fat.
- Trim fat — scraps trimmed off steaks, roasts, and other cuts during butchering — works fine but usually carries more connective tissue and a stronger beef flavor and smell. It’s perfectly usable, especially for cooking tallow you’ll use in savory dishes, but it’s not what you want if you’re after odorless, cosmetic-grade tallow for skin care or baking.
Where to get it: Ask a butcher counter or local farmer directly — fat is often cheap or even free because most people don’t want it. Grass-fed vs. grain-fed matters for the nutrient profile (grass-fed tallow tends to have more CLA and a better omega-6:omega-3 ratio) but doesn’t meaningfully change the rendering process.
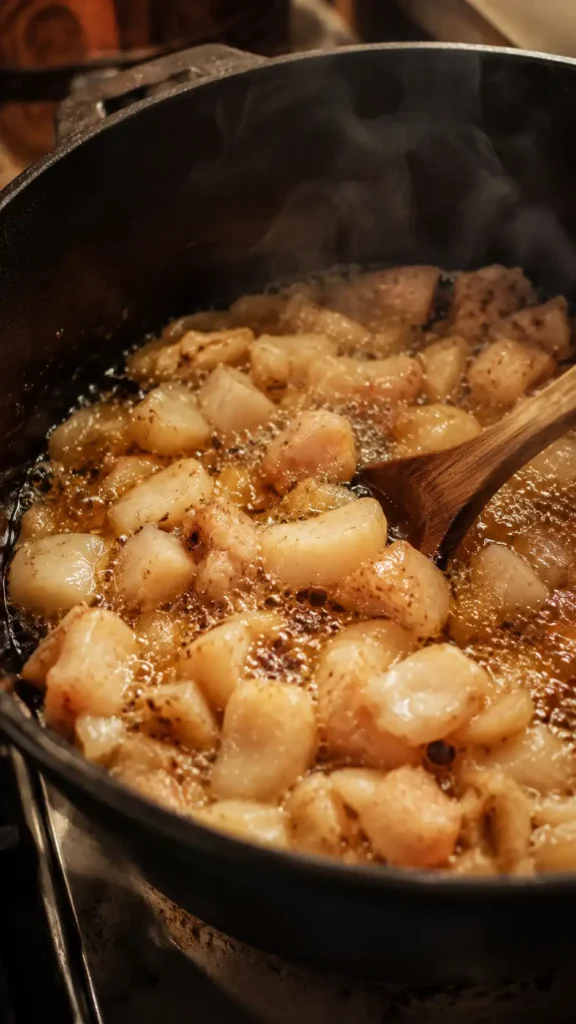
Two Rendering Methods: Wet vs. Dry
Both work. They just trade time for cleanliness.
Dry Rendering (the classic method)
You melt the fat with no added liquid, directly in a pot. It’s faster and simpler but requires more attention, since scorching happens easily once most of the water has cooked off.
Wet Rendering (the method I actually recommend for beginners)
You add water to the pot along with the fat. The water keeps the temperature from climbing above 212°F (100°C) until it fully evaporates, which makes scorching far less likely and tends to produce a cleaner-tasting, whiter tallow because impurities settle into the water layer instead of browning in the fat. The tradeoff is a longer cook time and an extra cooling/separating step.
If this is your first time, wet render. It’s much more forgiving.
What You’ll Need
- 3–5 lbs beef fat (leaf fat or suet), cut or ground into roughly 1-inch pieces — the smaller the pieces, the faster and more even the render
- A heavy-bottomed stockpot or Dutch oven (thin pots scorch fat)
- 1–2 cups water (if wet rendering)
- A fine-mesh strainer or colander
- Cheesecloth or a coffee filter for the final strain
- Heatproof glass jars or containers for storage
- An instant-read or candy thermometer (optional, but it removes almost all the guesswork)
How to Make Beef Tallow: Step-by-Step Method
1. Cut or grind the fat small
Chop the fat into roughly 1-inch cubes, or run it through a meat grinder if you have one. Smaller pieces render faster and more completely — this single step probably saves more time than anything else you can do. If the fat came straight from the fridge, this is much easier when it’s still cold and firm.
2. Load the pot
Put the fat in your pot. If wet rendering, add about 1 cup of water per 3–4 lbs of fat — just enough to cover the bottom and keep things from catching before the fat starts releasing its own liquid.
3. Render low and slow
Set the burner to low-medium — you’re aiming for 200–225°F (93–107°C), well below the smoke point of the fat itself. Let it go, stirring occasionally, for 2–4 hours depending on volume. You’ll see it happen in stages:
- First 30–45 min: fat softens and starts to release liquid
- Next 1–2 hours: steady melting, liquid fat pools at the bottom, solid bits float
- Final stretch: the solid cracklings turn golden-brown and sink or shrink noticeably — that’s your cue it’s mostly done
Do not rush this by cranking the heat. Above roughly 250°F you risk scorching the proteins, which is what gives rendered fat that strong, unpleasant “tallow smell” people complain about. Low and slow is what gets you the clean, nearly neutral result.
4. Strain
Once the cracklings are golden and the liquid has stopped looking cloudy, strain the hot liquid through a fine-mesh strainer into a heatproof bowl to remove the solids. Save the cracklings — salted and crisped further in a dry pan, they’re genuinely excellent, like a beef version of pork rinds.
5. Second strain (don’t skip this)
Line your strainer with cheesecloth or a coffee filter and strain again. This is the step that separates “pretty good tallow” from “restaurant-quality, shelf-stable tallow.” It removes the fine particulate that causes premature rancidity and cloudiness.
6. Separate the water (wet render only)
Pour the strained liquid into a container and refrigerate until fully solid, usually 4–8 hours. The tallow will rise and set as a solid cap on top of the water. Lift it off, pat the bottom dry, and discard the water (which will smell distinctly beefy — that’s normal and it’s exactly what you wanted to separate out).
7. Optional: re-melt and pour
For the cleanest possible finish, gently re-melt the separated tallow one more time and pour it into your final storage jars while liquid. This gives you a smooth, even set and lets any last trace of moisture evaporate off — moisture left behind is the number one cause of tallow going rancid early.
Storage and Shelf Life
- Room temperature, airtight, dark place: 6–12 months
- Refrigerated: 1–2 years
- Frozen: 2+ years, essentially indefinitely for practical purposes
Rancidity shows up as a sharp, sour, or “crayon-like” smell — very different from tallow’s normal mild beefy scent. If it smells sharp or off, toss it. Properly rendered and strained tallow is remarkably stable, which is exactly why it was a pre-refrigeration pantry staple for centuries.
Beef Tallow for Cooking: What It’s Actually Good At
- High-heat cooking: tallow has a smoke point around 400°F (204°C), making it excellent for searing steaks, frying, and roasting potatoes (this is the actual secret behind old-school steakhouse fries)
- Pastry and pie crust: produces an exceptionally flaky texture, similar to lard
- Soap and skin balms: its fatty acid profile is close to that of human skin sebum, which is why it shows up so often in DIY skincare
- Seasoning cast iron: a thin coat and a bake creates a durable, food-safe patina
5 Beef Tallow Recipes to Try First
Once you’ve got a jar of finished tallow, here’s where to actually use it.
1. Beef Tallow Fries Toss cut potatoes in melted tallow, spread on a sheet pan, and roast at 425°F (220°C) for 35–40 minutes, flipping halfway. The high smoke point gives you a shatter-crisp exterior that oil alone rarely achieves.
2. Tallow-Seared Steak Melt a tablespoon in a cast-iron pan until just smoking, then sear steaks 2–3 minutes per side. Tallow’s neutral, slightly beefy flavor complements red meat better than butter, which burns at lower temps.
3. Flaky Tallow Pie Crust Swap tallow 1:1 for the shortening or lard in any classic pie crust recipe. Keep it cold and cubed before cutting into the flour, exactly like you would with butter.
4. Tallow-Roasted Vegetables Toss root vegetables — carrots, potatoes, parsnips — in melted tallow with salt before roasting. It handles high oven temps without smoking or turning bitter the way some oils do.
5. Homemade Tallow Popcorn Melt a spoonful over popped popcorn instead of butter for a richer, savory finish that doesn’t make the popcorn soggy the way melted butter can.
Troubleshooting
My tallow smells strongly “beefy” even after straining. This usually means the fat was trim rather than leaf fat/suet, or the render ran a bit too hot. Both are fine for cooking tallow, just less neutral for baking or skincare use.
It came out gray or off-white instead of ivory/white. Usually a sign of scorching from too-high heat, or skipping the second cheesecloth strain. Not unsafe, just not top-shelf.
It didn’t fully solidify. Either there’s still residual water in it, or the fat source had a higher unsaturated fat content (common with certain grass-fed animals or cuts). Re-melting and doing one more slow, low simmer to drive off remaining moisture usually fixes it.
Mold or fuzzy spots after storage. That means moisture got trapped in the jar before sealing. Discard it — don’t try to scrape and salvage.
Frequently Asked Questions
Is beef tallow healthy? It’s a saturated fat, so it’s calorie-dense and best used in moderation like any cooking fat, but it’s notably heat-stable and low in the polyunsaturated fats most prone to oxidizing into harmful compounds when heated — which is a real advantage over many seed oils for high-heat cooking specifically.
How much tallow does a pound of fat produce? Roughly 60–80% by weight ends up as usable liquid tallow, depending on fat quality — leaf fat renders at the high end of that range, trim fat at the lower end.
Can I render tallow in a slow cooker or oven instead of on the stovetop? Yes. A slow cooker on low, or an oven set to 200–225°F with the pot uncovered, both work well and require even less babysitting than a stovetop — just budget more time, often 6–8 hours.
Do I need to refrigerate tallow? Not immediately after making it, as long as it’s properly strained and stored airtight in a cool, dark spot. Refrigeration or freezing simply extends the shelf life significantly and is worth it if you’re not using it within a few months.
Is beef tallow the same as lard? No — lard is rendered pork fat, tallow is rendered beef (or sometimes lamb/mutton) fat. They’re used similarly in cooking and baking, but tallow is firmer at room temperature and has a slightly more savory, beefy flavor.
What’s the difference between beef tallow and beef dripping? They’re closely related — “dripping” traditionally refers to fat collected from roasting meat (often with pan juices mixed in), while tallow is purpose-rendered from raw fat and is purer and more shelf-stable.
Ingredients
Method
- Trim and clean the fat: Remove any large bits of meat or silver skin. A little is fine, but too much will darken the tallow.
- Chop or grind: Cut the fat into very small cubes, about 1/4 inch, or run it through a meat grinder. Smaller pieces render faster and cleaner.
- Choose your method: Use a heavy pot on the stovetop (lowest heat), a slow cooker on low, or a covered Dutch oven in the oven at 225°F (107°C).
- Start with a splash of water (optional): Add 2–4 tablespoons to the pot with the fat. It keeps the fat from browning early; it will evaporate as it renders.
- Render low and slow: Cook uncovered, stirring every 15–20 minutes. Keep heat low. You want gentle bubbling, not frying. This takes 1.5–3 hours depending on batch size.
- Watch for doneness: The fat pieces (cracklings) will shrink and turn golden, and clear liquid fat will pool. When most solids are golden and the bubbling slows, you’re done.
- Strain carefully: Line a fine-mesh strainer with cheesecloth or a coffee filter. Pour the hot liquid fat into a clean, heatproof jar or container. Do this over a bowl or tray to catch drips.
- Optional second strain: For ultra-clean tallow, strain again through a fresh filter while still warm.
- Cool and solidify: Let the jars cool at room temp, then cover. The tallow will turn creamy white or pale yellow as it sets.
- Save the cracklings: Return the strained solids to the pan and cook a bit longer to crisp. Season lightly with salt. Great as a crunchy snack or salad topper.
Printable Recipe Card
Want just the essential recipe details without scrolling through the article? Get our printable recipe card with just the ingredients and instructions.